We understand that it might feel overwhelming preparing for new windows to be installed. However, with some careful planning and organisation, you can help make the process go smoothly and with minimal disruption.
Whenever you order windows from us, we’ll send you instructions on how to prepare for installation. But we’ve decided to share some tips on how to prepare your house for new windows to be installed with our wider community.
We’ve listed these items in the order that we’d do them in… you want to keep your privacy for as long as possible, after all!
1. Communicate with the head office and the window installation team
We pride ourselves on keeping our customers well informed. But lead times can be long and we don’t want to bombard you with update phone calls and emails, when all there is to say is ‘your windows are still being manufactured’. That said we will let you know an approximate install date once your order has been placed and we will be in touch nearer the time to arrange a firmer install date and schedule.
When the lead times are a distant memory and it’s time for your new windows to be installed, it’s also important to communicate with the installation team throughout the process.
Be clear about your expectations and ask any questions you may have before the installation. Our installation team is very professional and experienced and it’s best you leave them to get on with the installation. This will ensure that the installation runs smoothly and is completed to your satisfaction
2. Inform your neighbours about your upcoming new window installation
Look, if you’re having new windows installed, it’s not going to be a secret from your neighbours for long, so you may as well get ahead and inform them ahead of time!
Window installations can be noisy and disruptive, especially if you live in a shared building or a cul-de-sac with close proximity to other houses.
Informing your immediate neighbours of the upcoming installation is a polite and considerate gesture. It’s not something you need to do but will mean that most – if not all – of your neighbours will be on board with leaving enough room for the van to park (if you don’t have a private driveway) or will be able to prepare for the noise if they work from home, etc.
You only need to let them know the dates and times when the installation will be taking place and that will give them enough information to prepare accordingly, if they need to at all.
It will also help prevent any complaints from neighbours regarding noise or disturbance during the installation!
3. Plan your schedule.
Window installation can take anywhere from a few hours, to a few days, or even weeks, , depending on the size and complexity of the job.
You don’t need to be at home during the whole installation, but it’s really handy if you’re at home to let our installers in, show them what’s what, offer them a cuppa and some biscuits…you know!
4. Clear the area around the windows that are due to be replaced.
As you approach your install date, the next step is to clear the perimeter around the windows that are being replaced, from both inside and outside.
This means removing furniture, plant pots, wall hanging pictures, decorations, or any other items that are near-to or obstructing the window area. It’s also wise to check for any curled up rug edges or loose paving slabs; trip-ups can be nasty.
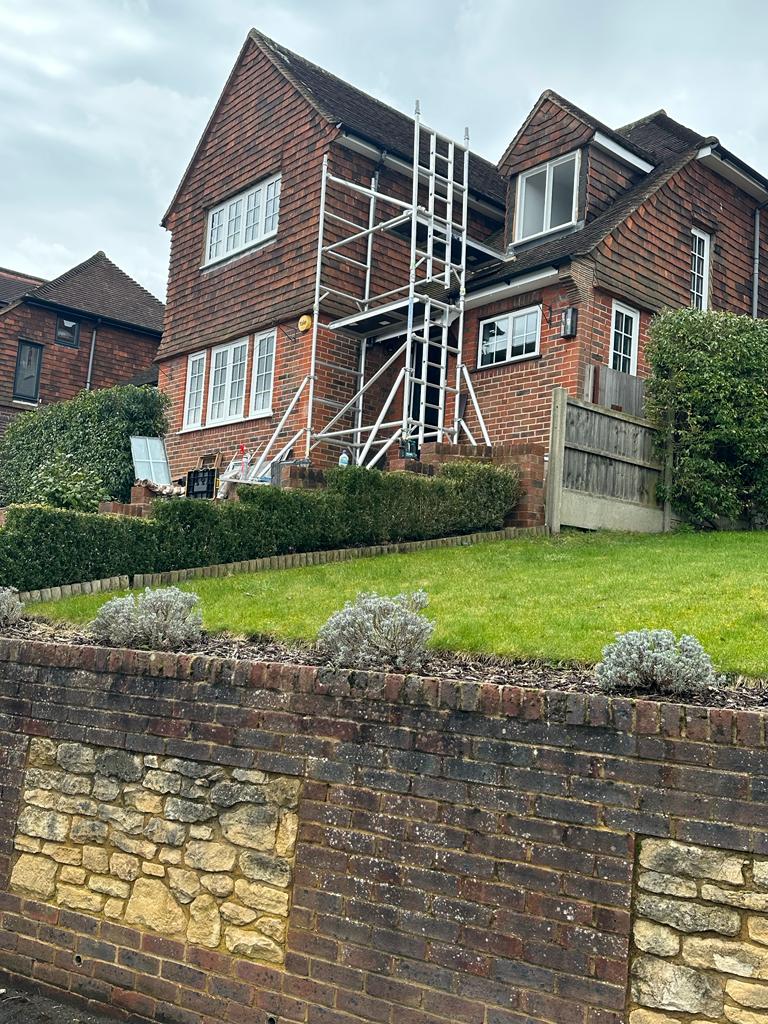
Any windows being installed above ground level may require scaffolding, so make sure plenty of room is available for the scaffolding.

Doing these things will allow the installation team to work without any interruptions or hazards. Whilst our installers take the best care of your home and are FENSA compliant (making sure they’re up to date on the latest health and safety guidelines), humans are not machines. There is always scope for accidents to happen and a plant pot (or a loose paving slab!) in the way is not only risky for the plant pot but risky for the installer too!
5. Clear all window sills.
This might seem obvious, but it’s not so obvious that we always arrive at a house with clear window sills!
Window Sills are fab places to display ornaments, trinkets and family photos and we know how precious those items can be. But us having to clear those items away with care and consideration takes time…time that would be much better installing your windows.
6. Remove window coverings.
You probably want to leave this task to the day/s leading up to the window installation. Window coverings include blinds, curtains and any other accessories that are attached to the window frames.
Making sure your windows are clear will help the installation team access the windows easily, while also reducing the risk of damage to your curtains or blinds.
Top tip: If you’re planning on reinstating the same window coverings, this could be a great time for you to give them a spruce up and clean! You’ll be able to store them safely whilst your new windows are being installed and when you re-hang them, the whole area will sparkle!
7. Protect your floors.
We pride ourselves on leaving your home as we found it. You only need to look at our testimonials to see how pleased our customers are with our complimentary cleaning service (we jest, our installers are just very particular about making sure they leave no trace!)
Window removal and installation involves a lot of movement and foot traffic, which has the potential to lead to scratches, dents, and other damage to your floors if the installers aren’t careful (again, humans, not machines, accidents happen!)
If you have hardwood or tile floors, consider using drop cloths or protective padding to cover the floors around the windows that are being replaced. This will help prevent any accidental damage and keep your floors looking clean and new.
8. Secure your pets.
You love your pets, we love your pets, and we don’t want them to come to any harm.
If you have pets, it’s important to keep them away from the work area during the installation to prevent any accidents or escapes.
Pets can easily become startled or distressed by the noise and activity during the installation, so it’s best to secure them in a safe area of the house or have them looked after during the installation.
Preparing your house for new window installation doesn’t have to be a daunting task, and doing all of these things will help everyone in the long run.
With these tips, you can rest assured that you’ll support a smooth and efficient installation process that will leave you with beautiful, new windows to enjoy for years to come.
If you’re considering new windows for your home or have any questions about the installation process, please do get in touch.

